So, you want to start making your own assessments or update an old assessment… You have come to the right place, my friend! By the end of this guide, you will be well on your way to creating your own assessment. The only thing you will need to do is print out (or type into the PDF version) the Project Based Assessment Guide planning sheet.
In this step-by-step guide, I will be walking you through how I created one of my favorite assessments: Linear Inequalities Landscape Design Project.
Step 1: Choose a standard
I align my assessments with the Algebra 1 Common Core standards, but you can use whichever set you prefer! These are the that standards I used to create my assessment:
CCSS.MATH.CONTENT.HSA.REI.B.3: Solve linear equations and inequalities in one variable, including equations with coefficients represented by letters.
CCSS.MATH.CONTENT.HSA.REI.A.1: Explain each step in solving a simple equation as following from the equality of numbers asserted at the previous step, starting from the assumption that the original equation has a solution.
step 2: research possible topics
If you are stuck with a creativity block, take to the internet! The goal here is not to copy someone else’s work, but to see what is out there and what looks interesting to you. Think about some topics that interest you or your students and how you could relate them to math.
I really like designing and animals, so a lot of my assessments are based around these topics (Factoring at the Dog Park). I wanted to create an assessment where my students could use their creativity to design a dream backyard for their clients. By framing the assessment as a “job” the students are more engaged and take it seriously.
step 3: create the assessment
Think about what the problem is that you want your students to solve. With my landscape design project, I knew that I wanted my students to create a design that was below their clients budget and fit into the backyard space. They needed to figure out the maximum square feet for a pool, a patio, and a garden(s). What will your students have produced by the end of the assessment?
step 4: crunch the numbers
For this part of the assessment, you need to decide whether you will be giving your students all of the information that they need or only part of it. For example, I gave my students some information about different companies that they could choose from, but allowed them to create the budget. Here is the pricing outline for the pools:


step 5: critical thinking
These are my go-to higher order thinking skills that really show my students’ understanding of a concept. Check out the planning sheet to get some ideas about how you can integrate these skills into your assessment.
I chose to use develop, compare/contrast, and defend in my assessment. Below is the organizer that my students were given to show their work and compare the two companies.

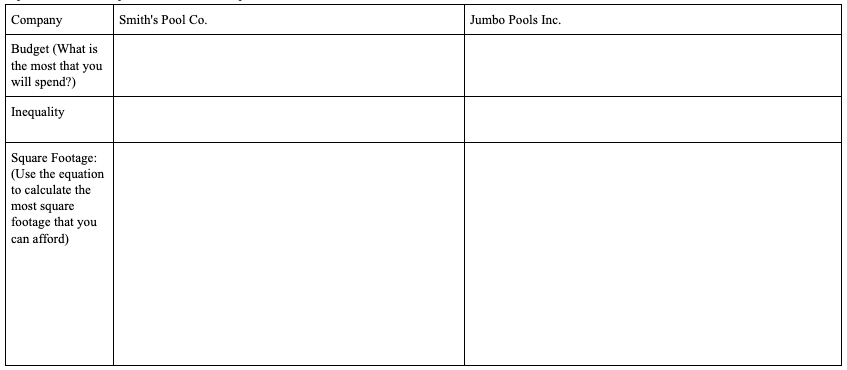
Once the students chose a company, they defended their choice using information from their work. Note: I told them that they did not necessarily have to chose the cheapest option, if that is not what they though their clients would like the most.
Use the planning sheet to brainstorm some higher order thinking questions that relate to your topic.
step 6: make it happen
Now that you have your idea, some problems, and critical thinking questions, you can focus on the details! Take a few minutes to think about the materials that your students will need to complete this assessment.
If they are doing a lab-based project, they might need rulers or manipulatives. If they are designing, they might need colored pencils, final draft paper, or a computer. By having your materials ready and planned, it will relieve a lot of unnecessary stress for both you and your students during the assessment.
Additionally, you need to think about how many questions you want the assessment to have. When I was thinking through my landscape project, I had a ton of ideas of what I wanted my students to create. However, I knew I needed to create some space for critical thinking questions, so I had to pull back a bit.
I planned about 3 class periods for my students to complete this assessment entirely. You know your students the best, so your assessment should be based on what will be most effective and meaning for them.
step 7: revise
When I first created this project, it was targeted to assess my students’ ability to solve multi-step equations. I gave them all of the information including the budget and honestly it didn’t make much sense the way that I had it. It wasn’t until I gave it to my class that I realized what was wrong with it. After that I went back to the drawing board and turned it into an inequalities assessment that gave my students more freedom to create what they wanted. Learn from my mistakes and complete the assessment yourself first, then give it to someone else to make sure that the questions and directions are completely clear. Your future self will thank you!
Get your guide and step-by-step planning sheet!
Do you want pre-made project based activities and assessments without needing to make them? Check out my any of my resources to find exactly what you need!