Teaching polynomial operations has always been my favorite Algebra 1 unit. To me, it feels like solving puzzles. Once you know how to solve one problem, you can solve any. However, one specific way of solving polynomial operations may not always make sense to every student.
This blog post shares various methods for teaching adding, subtracting, and multiplying polynomials that cater to diverse learning styles and your specific classroom needs.

Always start your polynomials unit with a review of combining like terms. I know what you’re thinking…my students have been combining like terms since 7th grade, so they should know how to do it. I completely agree.
However, polynomials are a completely new concept for your Algebra 1 students and it goes a long way to do a simple review activity or introduction to ease into the lesson. These guided notes for adding and subtracting polynomials offer a quick and easy review of combining like terms before jumping right into the meat of the lesson.
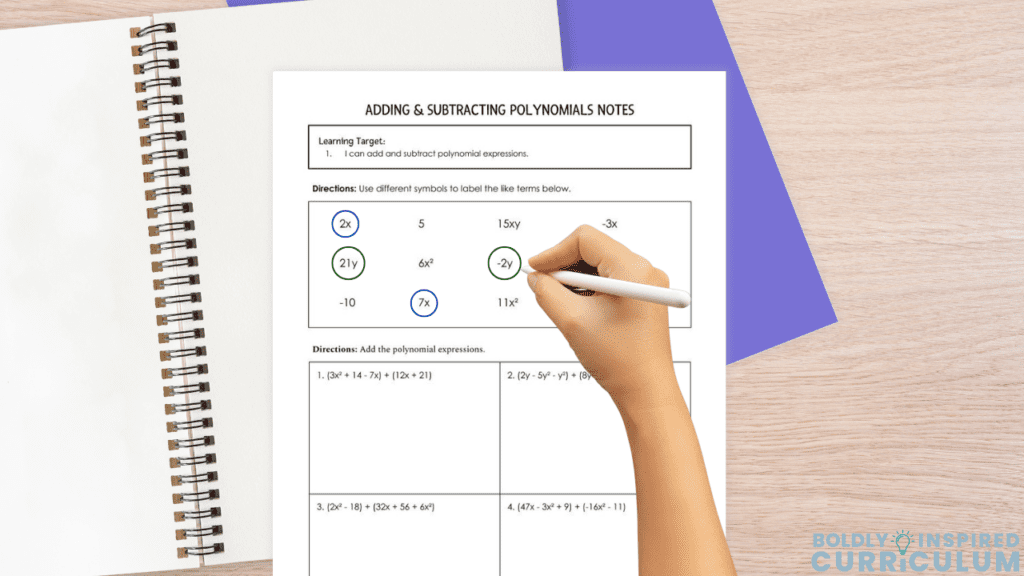
Table of Contents
ToggleAdding and Subtracting Polynomials
Horizontal Method:
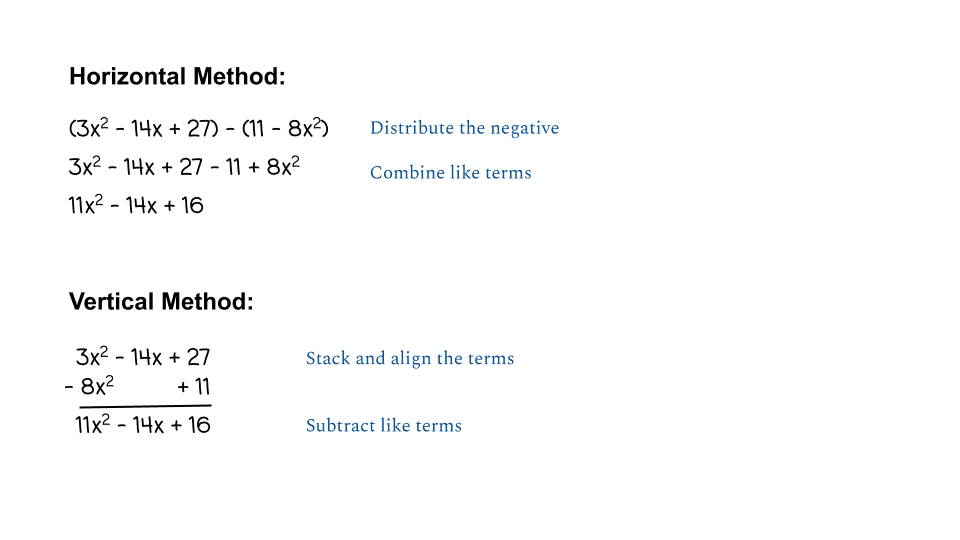
The horizontal method of adding and subtracting polynomials is just a different way of saying distribute. There are a few ways that I like to break down adding polynomials, so that my students don’t miss any steps.
The first step is to get rid of the parentheses. If the polynomials are being added, the signs of the second polynomial don’t need to be changed. However, if the polynomials are being subtracted it’s crucial to distribute the negative sign to each term before getting rid of the parentheses.
Once the parentheses are out of the way, you can start combining like terms. During this step, you can give your students the option to mark the different terms or cross the terms off as they add them to their final answer.
I always start with the terms with the highest degree, combine them, cross them out on my original problem, then move on to the next.
Vertical Method:
If your students prefer a more structured approach to adding and subtracting polynomials, the vertical method is a great option.
Instead of starting with distributing the negative sign, your students will take the two polynomials and stack them on top of each other. Make sure when they stack the two expressions that all of the terms are aligned.
They will often have polynomials that don’t have like terms causing gaps in the problem, so it is important to ensure that your students are always aligning like terms rather than just first to last.
The image below shows an example solved using both the horizontal and vertical methods.
Multiplying Polynomials
Double Distribution (FOIL)
Double distribution (more commonly known as FOIL) is the standard way to teach multiplying polynomials.
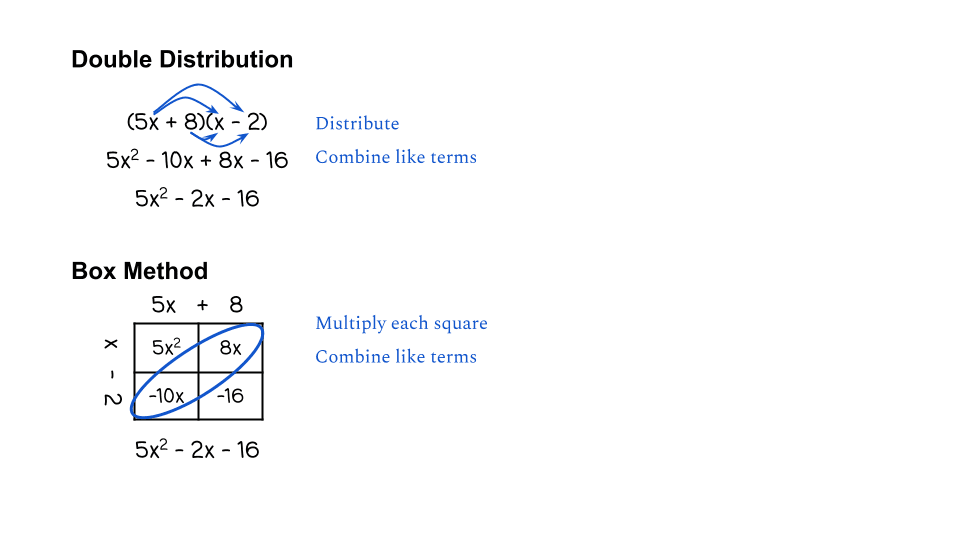
This method follows the same rules as the generic distributive property where students multiply the outer term by the two terms inside of the parentheses. The only difference is with double distribution, your students will be multiplying both terms in the first binomial to the second polynomial. This then requires students to combine like terms to get to the final answer.
FOIL is an acronym for First, Outer, Inner, Last which ensures students don’t leave out any terms. However, many math teachers are moving away from this acronym because it takes away the “why” behind distributing and it only works when multiplying two binomials. As students start completing more challenging problems, for example with trinomials, the FOIL method is no longer helpful.
Box Method
The box method is ideal for students who struggle with conceptualizing the solving process and tend to forget steps. It is a visual way for students to make sure they have multiplied all of the terms and solved the problem completely.
Using the box method, students are able to break down a problem and organize it in a way that shows the “why” behind distributing. It also simplifies combining like terms.
The image below shows an example solved using both double distribution and the box method.
At the beginning of each lesson, whether I am teaching adding, subtracting, or multiplying, I always tell my students they have the choice of solving in the way that makes the most sense in their brains. It’s important for students to know that there are multiple ways to get to the correct answer.
Teaching Polynomial Operations with Algebra Tiles
Algebra tiles are a great introductory lesson or supplemental activity for students who really need to visualize a math concept to understand it.
The hands-on aspect of algebra tiles will increase engagement during your lesson and your students will be much more likely to remember the steps.
Adding and Subtracting with Algebra Tiles
Teaching adding and subtracting polynomials with algebra tiles is simple. Give your students an example to try on the board and have your students create each polynomial expression using the tiles.
If your students haven’t used algebra tiles before make sure to note that the colored side is positive and the red side is negative. You may need to review the algebra tiles, so your students know what each tile represents.
Here is an example:
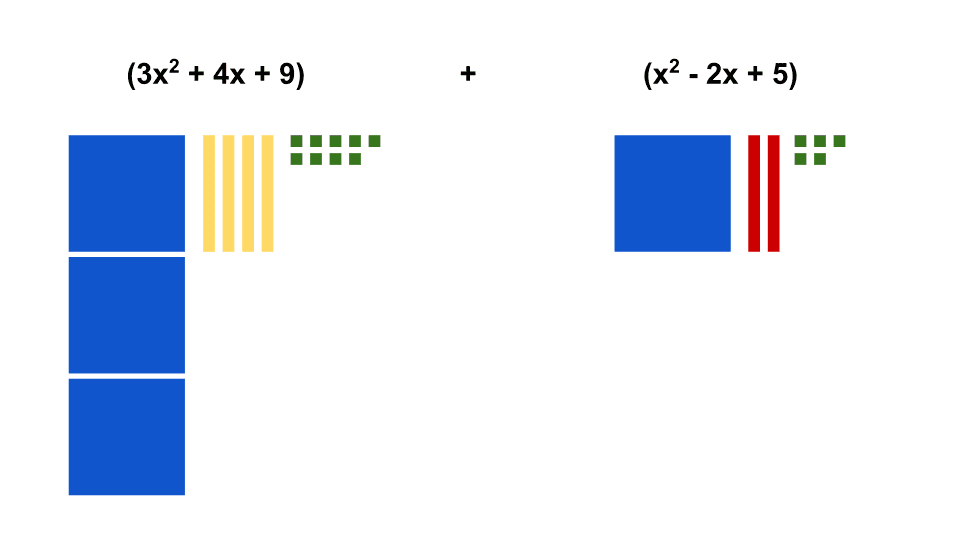

As you can see, the two polynomials are depicted using algebra tiles and the final answer is found by combining like terms. If your students are using algebra tiles to subtract polynomials, make sure that they distribute the negative to the second polynomial before creating their depiction and combining like terms.
Multiplying with Algebra Tiles
Just like teaching multiplying polynomials algebraically, multiplying polynomials with algebra tiles is a bit trickier than teaching adding and subtracting.
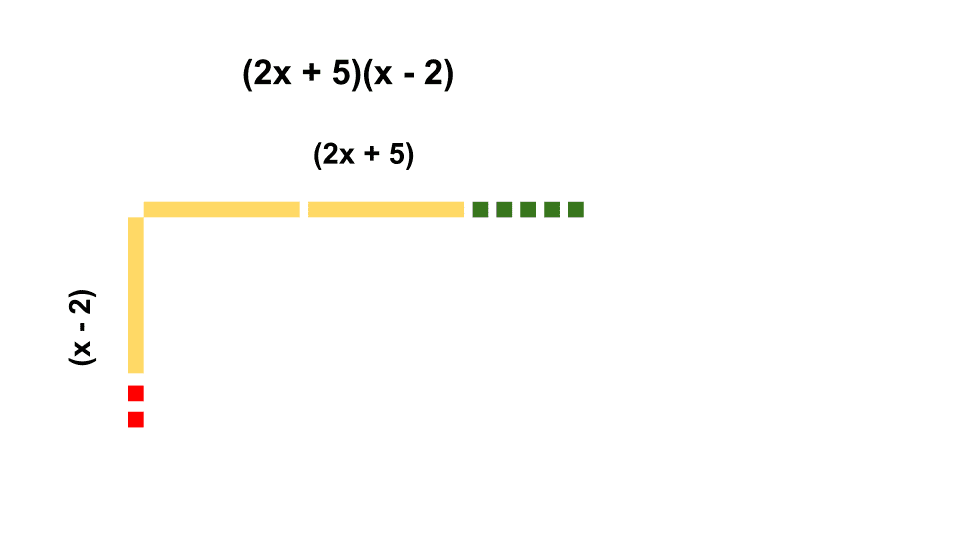
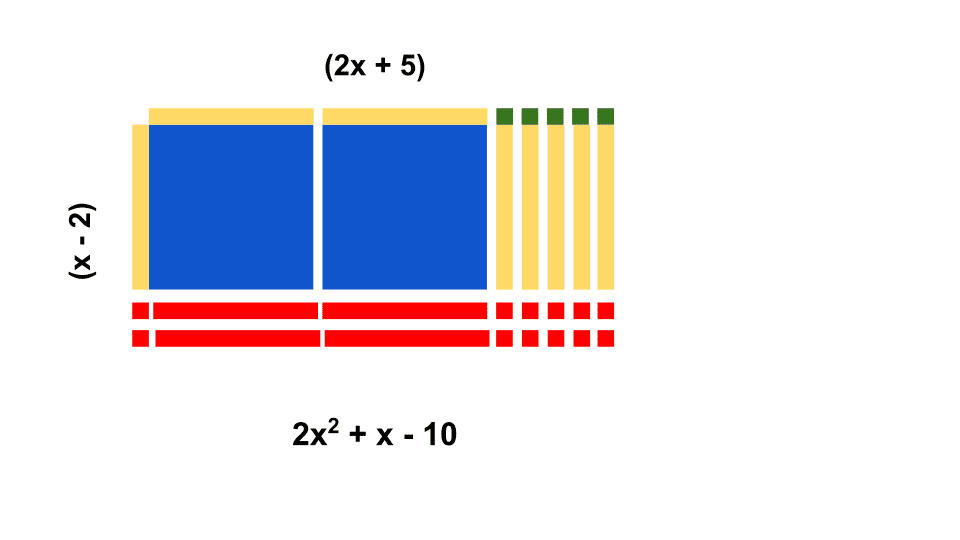
This method is most similar to the box method where students are aligning the polynomials like the box method, then getting their answer by creating a rectangle.
It is easiest to do very simple problems with algebra tiles as adding large coefficients can make your students “rectangles” very large and hard to reason with. Here is a simple example you can try with your class:
Final thoughts about teaching polynomial operations
By incorporating different instructional strategies and offering student choice, you can create a more engaging and effective learning experience for your Algebra 1 students. Remember that every student learns differently, so it’s essential to provide multiple pathways to understanding polynomial operations.

Pingback: 10 Low-Prep Polynomial Operations Activities for Algebra 1
Comments are closed.